Glitz Pit: Difference between revisions
Memelord2020 (talk | contribs) m (→Synopsis) |
Dorsal Axe (talk | contribs) (→Ranked Match: Switching some pictures in table to team photos seen in the remake (still getting the rest)) |
||
| Line 56: | Line 56: | ||
{|class="wikitable" style="margin: 0 auto; text-align: center;" | {|class="wikitable" style="margin: 0 auto; text-align: center;" | ||
|-style="background: yellow;" | |- style="background: yellow;" | ||
|colspan="6"|'''Ranked Match Fighters''' | |colspan="6"|'''Ranked Match Fighters''' | ||
|-style="background:lightyellow" | |- style="background:lightyellow" | ||
| | | style="width: 2%;" |'''Rank''' | ||
| | | style="width: 2%;" |'''Picture''' | ||
| | | style="width: 10%;" |'''Team Name''' | ||
| | | style="width: 10%;" |'''Fighters''' | ||
| | | style="width: 30%;" |'''Storyline progression''' | ||
|- style="background-color: #e6ffff;" | |- style="background-color: #e6ffff;" | ||
! 20 | ! 20 | ||
| [[File:PMTTYD | | [[File:PMTTYD NS Fighter The Great Gonzalez.png|250px]] | ||
| <span style="font-size: 0.9em;">''The Merciless Executioner''{{footnote|main|3}}</span><br>'''[[Mario|The Great Gonzales]]''' | | <span style="font-size: 0.9em;">''The Merciless Executioner''{{footnote|main|3}}</span><br>'''[[Mario|The Great Gonzales]]''' | ||
| Mario and his partners | | Mario and his partners | ||
| Line 72: | Line 72: | ||
|- style="background-color: #e6ffff;" | |- style="background-color: #e6ffff;" | ||
! 19 | ! 19 | ||
| [[File: | | [[File:PMTTYD NS Fighter The Goomba Bros.png|250px]] | ||
| <span style="font-size: 0.9em;">''The Meteorite Hardheads''{{footnote|main|2}}</span><br>'''[[Goomba Bros.|The Goomba Bros.]]''' | | <span style="font-size: 0.9em;">''The Meteorite Hardheads''{{footnote|main|2}}</span><br>'''[[Goomba Bros.|The Goomba Bros.]]''' | ||
| 5 [[Goomba]]s | | 5 [[Goomba]]s | ||
| Line 78: | Line 78: | ||
|- style="background-color: #e6ffff;" | |- style="background-color: #e6ffff;" | ||
! 18 | ! 18 | ||
| [[File: | | [[File:PMTTYD NS Fighter The KP Koopas.png|250px]] | ||
| <span style="font-size: 0.9em;">''The Shell Machines of Doom''</span><br>'''[[KP Koopas|The KP Koopas]]''' | | <span style="font-size: 0.9em;">''The Shell Machines of Doom''</span><br>'''[[KP Koopas|The KP Koopas]]''' | ||
| 2 [[KP Koopa]]s & 1 [[KP Paratroopa]] | | 2 [[KP Koopa]]s & 1 [[KP Paratroopa]] | ||
| Line 84: | Line 84: | ||
|- style="background-color: #e6ffff;" | |- style="background-color: #e6ffff;" | ||
! 17 | ! 17 | ||
| [[File: | | [[File:PMTTYD NS Fighter The Pokey Triplets.png|250px]] | ||
| <span style="font-size: 0.9em;">''The Spiked Terror Triplets''</span><br>'''[[Pokey Triplets|The Pokey Triplets]]''' | | <span style="font-size: 0.9em;">''The Spiked Terror Triplets''</span><br>'''[[Pokey Triplets|The Pokey Triplets]]''' | ||
| 3 [[Pokey]]s{{footnote|main|1}} | | 3 [[Pokey]]s{{footnote|main|1}} | ||
| Line 90: | Line 90: | ||
|- style="background-color: #e6ffff;" | |- style="background-color: #e6ffff;" | ||
! 16 | ! 16 | ||
| [[File:PMTTYD Dead Bones.png| | | [[File:PMTTYD NS Fighter The Dead Bones.png|250px]] | ||
| <span style="font-size: 0.9em;">''The Bone-Rattling Rockers''</span><br>'''[[Dead Bones|The Dead Bones]]''' | | <span style="font-size: 0.9em;">''The Bone-Rattling Rockers''</span><br>'''[[Dead Bones|The Dead Bones]]''' | ||
| 3 [[Dull Bones]]{{footnote|main|1}} | | 3 [[Dull Bones]]{{footnote|main|1}} | ||
| Line 96: | Line 96: | ||
|- style="background-color: #e6ffff;" | |- style="background-color: #e6ffff;" | ||
! 15 | ! 15 | ||
| [[File: | | [[File:PMTTYD NS Fighter Spike Storm.png|250px]] | ||
| <span style="font-size: 0.9em;">''The Midnight Spike-Bombers''</span><br>'''[[Spike Storm]]''' | | <span style="font-size: 0.9em;">''The Midnight Spike-Bombers''</span><br>'''[[Spike Storm]]''' | ||
| 2 [[Spiny|Spinies]]{{footnote|main|1}} & 1 [[Lakitu]] | | 2 [[Spiny|Spinies]]{{footnote|main|1}} & 1 [[Lakitu]] | ||
| Line 102: | Line 102: | ||
|- style="background-color: #e6ffff;" | |- style="background-color: #e6ffff;" | ||
! 14 | ! 14 | ||
| [[File:The Hand-It-Overs.png| | | [[File:PMTTYD NS Fighter The Hand-It-Overs.png|250px]] | ||
| <span style="font-size: 0.9em;">''The Grim Death Burglars''</span><br>'''[[Hand-It-Overs|The Hand-It-Overs]]''' | | <span style="font-size: 0.9em;">''The Grim Death Burglars''</span><br>'''[[Hand-It-Overs|The Hand-It-Overs]]''' | ||
| 2 [[Bandit]]s & 2 [[Big Bandit]]s | | 2 [[Bandit]]s & 2 [[Big Bandit]]s | ||
| Line 108: | Line 108: | ||
|- style="background-color: #e6ffff;" | |- style="background-color: #e6ffff;" | ||
! 13 | ! 13 | ||
| [[File:PMTTYD Punk Rocks | | [[File:PMTTYD NS Fighter The Punk Rocks.png|250px]] | ||
| <span style="font-size: 0.9em;">''The Green Torture Squad''</span><br>'''[[Punk Rocks|The Punk Rocks]]''' | | <span style="font-size: 0.9em;">''The Green Torture Squad''</span><br>'''[[Punk Rocks|The Punk Rocks]]''' | ||
| 3 [[Hyper Bald Cleft]]s | | 3 [[Hyper Bald Cleft]]s | ||
| Line 114: | Line 114: | ||
|- style="background-color: #e6ffff;" | |- style="background-color: #e6ffff;" | ||
! 12 | ! 12 | ||
| [[File:PMTTYD Mind-Bogglers.png| | | [[File:PMTTYD NS Fighter The Mind-Bogglers.png|250px]] | ||
| <span style="font-size: 0.9em;">''The Gray Entanglers''</span><br>'''[[Mind-Bogglers|The Mind-Bogglers]]''' | | <span style="font-size: 0.9em;">''The Gray Entanglers''</span><br>'''[[Mind-Bogglers|The Mind-Bogglers]]''' | ||
| [[Piranha Plant#Paper Mario: The Thousand-Year Door|Pale Piranha]], [[Dark Puff]], [[Pider]] | | [[Piranha Plant#Paper Mario: The Thousand-Year Door|Pale Piranha]], [[Dark Puff]], [[Pider]] | ||
| Line 120: | Line 120: | ||
|- style="background-color: #e6ffff;" | |- style="background-color: #e6ffff;" | ||
! 11 | ! 11 | ||
| [[File:PMTTYD Bob-omb Squad | | [[File:PMTTYD NS Fighter The Bob-omb Squad.png|250px]] | ||
| <span style="font-size: 0.9em;">''The Big Bomb Boomers''</span><br>'''[[Bob-omb Squad (group)|The Bob-omb Squad]]''' | | <span style="font-size: 0.9em;">''The Big Bomb Boomers''</span><br>'''[[Bob-omb Squad (group)|The Bob-omb Squad]]''' | ||
| Four [[Bob-omb]]s | | Four [[Bob-omb]]s | ||
| Line 126: | Line 126: | ||
|- style="background-color: #ffe6cc;" | |- style="background-color: #ffe6cc;" | ||
! 10 | ! 10 | ||
| [[File:Iron | | [[File:PMTTYD NS Fighter The Iron Adonis Twins.png|250px]] | ||
| <span style="font-size: 0.9em;">''The Armored Harriers''</span><br>'''[[The Iron Adonis Twins]]''' | | <span style="font-size: 0.9em;">''The Armored Harriers''</span><br>'''[[The Iron Adonis Twins]]''' | ||
| 2 [[Iron Cleft]]s | | 2 [[Iron Cleft]]s | ||
| After Mario | | After losing or forfeiting the match, Mario returns to the locker room to find that the [[Yoshi's Egg|egg]] has hatched into a [[Mini-Yoshi|Yoshi]]. Using Yoshi's [[Gulp]] ability, Mario is able to defeat the twins and move to the major-league. Rawk Hawk confronts Mario and his partners, but they discover that the Crystal Star on his [[Champ's Belt|belt]] is fake. Mario then receives an [[List of e-mails in Paper Mario: The Thousand-Year Door#Anonymous: No title 1|email]] from a mysterious sender called "X". | ||
|- style="background-color: #ffe6cc;" | |- style="background-color: #ffe6cc;" | ||
! 9 | ! 9 | ||
Revision as of 13:37, May 24, 2024


The Glitz Pit is an arena located in Glitzville in Paper Mario: The Thousand-Year Door. It is the main attraction of Glitzville, with fighters competing in the Glitz Pit seeking glory, and wealthy individuals betting on the outcome of matches in the arena. Mario and his partners are introduced to the Glitz Pit as they search for the third Crystal Star, the Gold Star, within Glitzville. Realising that it forms part of the Champ's Belt, Mario joins the Glitz Pit as a fighter to win the championship and the belt for himself.
The public-facing areas of the Glitz Pit consist of the main lobby, and the arena itself, which is accessed through either the lower or upper doorways in the center of the lobby. Mario can talk to some of the spectators, but will not be able move through the dense crowd. Random fighters can be seen competing on stage, jumping on or bumping into one another. Occasionally, a huge crowd of red and orange Toads and Lakitu appear in the lobby, but can be cleared away using the hammer.
Backstage, there is a long corridor surrounding the arena, two minor-league and two major-league locker rooms, the champion's room, the promoter's office, and a locked storage room. The locker rooms are divided into red and blue teams, though Mario can typically only access the red locker rooms on the left side of the corridor. The blue locker rooms on the right side are only accessible shortly before Mario's fight with Rawk Hawk.
Synopsis
In Chapter 3, Mario and his partners observe a match between The Koopinator and the arena's showboating champion, Rawk Hawk. During the fight, they discover that the Gold Star forms part of the Champ's Belt. Realising that they cannot steal the belt from Rawk Hawk, Mario signs on as a fighter to become the Glitz Pit champion and win the belt through legitimate means. At the insistence of the arena's promoter, Grubba, Mario takes on the mantle of "The Great Gonzales" as he fights his way up the ranks of the Glitz Pit. Grubba's assistant Jolene guides Mario through the process of matches in the Glitz Pit, but is otherwise cold towards him and his partners.
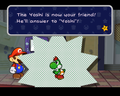
During the chapter, Mario faces numerous opponents and learns of several mysteries surrounding the Glitz Pit, including the disappearance of the previous champion Prince Mush. After one match, a friendly rival, King K, suggests to Mario that he visits the Hot Dog Stand outside. There he discovers a bouncing egg attempting to escape the proprietor, Mr. Hoggle, who reluctantly agrees to allow the egg to accompany Mario. King K retires from the Glitz Pit, and Mario's progress to the major league hits a roadblock when facing The Iron Adonis Twins. He is forced to forfeit the match due to their seemingly impenetrable durability. Upon returning to the locker room, the egg is revealed to have hatched into young Yoshi who joins Mario's party and who easily dispatches the Iron Adonis Twins by swallowing one and spitting it at the other.
Following his victory, Mario is promoted to the major league. He is confronted in the locker room by Rawk Hawk, and Mario's partner is able to determine that the Gold Star on his belt is a fake. Mario works to solve the mysteries of the Glitz Pit in between matches with the aid of a mysterious individual known as "X", who contacts Mario exclusively through email. During the course of his investigation, a fighter known as Bandy Andy goes missing, and is believed to have been spirited away by Rawk Hawk. Mario acquires the Super Hammer and discovers King K and Bandy Andy drained of their vitality and trapped under a large block in the arena's storage room. Bandy Andy warns Mario not to go to the arena when strange lights are showing, before collapsing from exhaustion. As Mario and his friends leave the room, they catch Jolene spying on them and ponder what it going on.
Ultimately, Mario reaches the top rank and faces off against the champion, Rawk Hawk, winning the match and the Champ's Belt. While inside the champion's room, Mario and his friends overhear a conversation through an air vent in which Grubba states he will eliminate Jolene and Mario, as they are getting too close to discovering his plans. Mario confronts Grubba in the arena, discovering that he is using the real Gold Star to charge a machine hidden under the stage in order to drain fighters of their vitality, and use it to keep himself young and strong. Grubba uses the power stored within the machine to greatly enhance his abilities, becoming Macho Grubba, the true boss of the chapter. Mario defeats Macho-Grubba and reclaims the Gold Star. Prince Mush reappears, revealing that he was imprisoned by Grubba after learning of his secret. It is revealed that Jolene is Prince Mush's sister, as well as the mysterious "X", who went undercover as Grubba's assistant to solve the mystery of Prince Mush's disappearance.
After the completion of Chapter 3, Jolene takes over from Grubba as the promoter of the Glitz Pit. Mario and his partners can optionally return to the arena and resume fighting from the minor leagues, starting over at Rank 20.
Seven Wonders of the Glitz Pit
According to Bandy Andy, the fighters within the Glitz Pit are said to pass stories of a set of mysteries that surround the arena. Throughout the chapter, all seven wonders are encountered and their true nature is discovered.
- The Sealed Wall — "They say...there's a sealed wall in the minor-league locker room. Some say...the remains of fallen athletes are stored in there..."
- The wall is actually a large yellow block breakable with the Super Hammer. The room it conceals does not contain the remains of fallen fighters, but research about the Crystal Stars in the form of a Dubious Paper. The part about fallen athletes appears to have been conflated with the large block in the storage room.
- The Man-Eating Toilet — "They say...in one of the arena's bathrooms, a man-eating toilet lurks. Some say...the anyone who sees this toilet never sees anything again..."
- The Stairs of Mystery — "They say...there's a room in the Glitz Pit with a second floor but no stairs... They say...no one has ever gone upstairs... And some say...that groaning voices sometimes come from that second floor..."
- The stairs are concealed in the Glitz Pit's storage room, activated with a hidden switch. The groaning voices belong to the fighters that Grubba drained and imprisoned under a large block on the upper floor of the room.
- The Haunted Boudoir — "They say...that the champion's room is haunted... Some say...if you keep still in the room, you'll hear voices whispering from nowhere... Some even say...the voices are athletes who lost to the champion..."
- The voice are actually the sound of voices coming from the promoter's office, with sound travelling through air vents connecting both rooms.
- The Spooky Ring-Lights — "My friend's friend's friend told me this one... He said...he saw a strange light leaking under the ring doors when no one was there. He couldn't see inside since the doors were locked. I plan to investigate this myself...""
- The strange light is in fact generated from Grubba's power-draining machine on the arena stage. It is implied that Grubba catches Bandy Andy investigating this secret, and so drains his power and imprisons him alongside the other victims.
- The Missing Ones — "They say...sometimes fighters disappear for no reason, never to return... Some say...that the very first champion, Prince Mush, was spirited away in this way..."
- The missing fighters disappeared after Grubba drained their power using his machine, and are imprisoned under a large hammer block in the storage room. The known missing fighters are Prince Mush, Bandy Andy, and King K, and all three recover after Macho Grubba is defeated.
- Grubba and Jolene — "Grubba is a strange one... His body is incredibly toned, even though he's past 60. He must have an exceptional training regimen. Then there's the matter of Ms. Jolene. They say...she suddenly vanishes at times. Some say...a fighter saw her go into a bathroom and waited for her to come out. But she never did. Huh? You think it's stranger that someone staked out her bathroom? Good point."
- Grubba is revealed to be using his power-draining machine to drain others of their vitality, and using it to enhance his own. Jolene's unexplained absences are revealed to be her taking on the pseudonym of "X", who contacts Mario via email from the Fresh Juice Shop.
Ranked Match
Mario is required to compete in ranked matches throughout the course of Chapter 3. As The Great Gonzalez, Mario begins in the minor-league at Rank 20. Upon reaching Rank 10, Mario will join the major league, and gain access to the major-league locker room. Upon defeating Rawk Hawk, Mario will become the champion and gain access to the champion's room.
All matches can be initiated from a computer terminal in either locker room, or in the champion's room. Mario will face each opponent in a fixed order, based on the opponent's own ranking within the Glitz Pit. Mario will also be imposed a condition that must be fulfilled in order to rank up. If Mario fails to meet the battle condition, he will not rank up will continue to face the same opponent in until meeting the condition and winning the match. If Mario loses the match, he will go down a rank in the Nintendo GameCube version of the game, but in the Nintendo Switch version Mario will remain at his current rank with no change.
Winning a ranked match will award coins, starting at 5 coins for the first ranked opponent defeated, and increasing by 1 coin for each subsequent opponent defeated. If Mario fails to meet the imposed battle condition, he will be paid a flat fee of 4 coins. If Mario loses or flees the battle, he will only receive 1 coin.
| Ranked Match Fighters | |||||
| Rank | Picture | Team Name | Fighters | Storyline progression | |
| 20 | 
|
The Merciless Executioner3 The Great Gonzales |
Mario and his partners | First arriving at the Glitz Pit, Mario and his partners observe Rawk Hawk showing off his belt while battling The Koopinator in the arena. The belt has the Gold Star on it, and Mario and his partners decide to sign up and fight to the top rank to earn it for themselves | |
|---|---|---|---|---|---|
| 19 | 
|
The Meteorite Hardheads2 The Goomba Bros. |
5 Goombas | A Goomba in the team strikes Mario first to initiate the battle. After the battle, King K introduces Mario to the other fighters in the locker room—Master Crash, Bandy Andy, and Cleftor. He talks to Mario often after the next few battles. | |
| 18 | 
|
The Shell Machines of Doom The KP Koopas |
2 KP Koopas & 1 KP Paratroopa | ||
| 17 | 
|
The Spiked Terror Triplets The Pokey Triplets |
3 Pokeys1 | Bandy Andy is caught by Jolene and sent back to the room. After a chat with King K, he sneaks out again. | |
| 16 | 
|
The Bone-Rattling Rockers The Dead Bones |
3 Dull Bones1 | King K speaks with Mario, after which they hears someone crying out in pain due to a foot injury while being escorted out of the Glitz Pit. | |
| 15 | 
|
The Midnight Spike-Bombers Spike Storm |
2 Spinies1 & 1 Lakitu | King K mentions a new "menu item" at the Hot Dog Stand outside. Mario can go there and check the Yoshi Egg at any time, but the Yoshi from that egg is needed in the Iron Adonis Twins battle. | |
| 14 | 
|
The Grim Death Burglars The Hand-It-Overs |
2 Bandits & 2 Big Bandits | King K mentions a "STUNNIN' babe" having a drink at the Fresh Juice Shop, who resembles a casually-dressed Jolene. | |
| 13 | 
|
The Green Torture Squad The Punk Rocks |
3 Hyper Bald Clefts | King K informs Mario that he is going to retire. | |
| 12 | 
|
The Gray Entanglers The Mind-Bogglers |
Pale Piranha, Dark Puff, Pider | King K is no longer present in the locker room, having evidently retired. | |
| 11 | 
|
The Big Bomb Boomers The Bob-omb Squad |
Four Bob-ombs | Master Crash and Cleftor are talking about King K's leave, and Jolene teaches a new fighter, Sir Swoop, how to use the terminal. | |
| 10 | 
|
The Armored Harriers The Iron Adonis Twins |
2 Iron Clefts | After losing or forfeiting the match, Mario returns to the locker room to find that the egg has hatched into a Yoshi. Using Yoshi's Gulp ability, Mario is able to defeat the twins and move to the major-league. Rawk Hawk confronts Mario and his partners, but they discover that the Crystal Star on his belt is fake. Mario then receives an email from a mysterious sender called "X". | |
| 9 | 
|
The Thorny Demons The Tiny Spinies |
2 Red Spike Tops | ||
| 8 | 
|
The Ultimate Weapons The Poker Faces |
2 Bristles | Mario is told by X via email to go to the Fresh Juice Shop outside the Glitz Pit. After he receives the Super Hammer from Podler in the juice bar, he is told to smash the blockade in the minor-league locker room. Behind the blockade, he finds the Dubious Paper and reads it, but it is then confiscated by Jolene. | |
| 7 | 
|
The Bottomless Vacuums The Fuzz |
Fuzzy, Green Fuzzy1, Flower Fuzzy | After the Fuzz are defeated, the Iron Adonis Twins challenges Mario's team again. Mario receives a threatening email after the battles. | |
| 6 | 
|
The Turtles of Hurtle The Shellshockers |
2 Shady Koopas & 1 Shady Paratroopa | Jolene leaves a cake from a fan to Mario. This cake is not poisoned. If Mario chooses not to eat it, Shellshock eats it instead while Mario and his partners go for the next battle. | |
| 5 | 
|
The Underworld Servants The Magikoopa Masters |
Red Magikoopa, Green Magikoopa, White Magikoopa | After Mario and his partners win the battle, they are challenged by Bowser. | |
| 4 | 
|
The Dark Gatekeeper Craw-Daddy |
Dark Craw | Mario is told by Jolene via email to go to the telephone booth. Meeting Rawk Hawk on the way, Mario finds a Storage Key and told again to go to the storage room near Grubba's office. He meets Jolene by the door, who pretends to tell him to stay away (this happens earlier if Mario goes there before). Inside Mario finds Ms. Mowz stealing stuff again, who mentions the "poor souls" upstairs. Hinted by another email, Mario finds the hidden stairs in the room and reaches an air vent, where he hears Jolene and Grubba discussing fighters going missing. | |
| 3 | 
|
The Big Bad Brute Bros. Hamma, Bamma, and Flare |
Hammer Bro, Fire Bro, Boomerang Bro | Mario receives a threatening email again from Grubba. After Mario makes a reservation, Jolene brings a cake from Rawk Hawk. The cake is poisoned, and if Mario chooses to eat it, Mario's partner proceeds to do so first and gets poisoned by the cake, becoming unavailable for the next battle. If Mario chooses not to eat it, Shellshock eats it instead while Mario and his partners go for the next battle and becomes poisoned himself. | |
| 2 | 
|
The Red Ore Fear Orbs Chomp Country |
2 Red Chomps | ||
| 1 | 
|
The Razor Blade Brigadier The Koopinator |
Dark Koopatrol | Mario is instructed by Jolene via email to remove the Gonzales posters in the lobby. After he removes the one to the left of the second-floor door to the arena with Flurrie, he finds another Storage Key and is then told to go to the second floor of the storage room. There, he finds Bandy Andy and King K thrown under a big yellow block. It's revealed that Jolene (under the pseudonym "X") has been aiding Mario the whole time in uncovering the truth behind the Glitz Pit. | |
| ⭐ | 
|
The Feral Nuclear Reactor (GCN) The Golden Grandstander (Switch) Rawk Hawk |
Rawk Hawk | Before the battle, Rawk Hawk tricks a security guard into locking Mario in a damp room. Mario and his partners escape through a toilet. After Mario defeats Rawk Hawk, he overhears Grubba discussing his plans and confronts him on the arena stage. | |
1 - These opponents have the ability to summon reinforcements.
2 - In the initial match with The Goomba Bros. they are titled Hoppin' Hardheads.
3 - If Mario returns to the Glitz Pit after Chapter 3, his title is changed to Superstar Sequel.
After the disappearance of Bandy Andy, The Hand-It-Overs are replaced with the Wings of Night, consisting of 4 Swoopers. After King K's disappearance, The KP Koopas are replaced with The Destructors, consisting of 2 Spinias and 2 Spanias. In the Nintendo GameCube version, these teams can only be challenged during Chapter 3 by losing matches and ranking down low enough to be matched with them. In the Nintendo Switch version, they can only be faced in an Exhibition Match, as it's not possible for Mario to lose rank.
As Mario rises through the ranks, the rankings between other contenders may shuffle. The only fighters whose positions stay the same are The Goomba Bros., The KP Koopas, The Pokey Triplets, The Dead Bones, The Iron Adonis Twins, The Shellshockers, The Koopinator, and Rawk Hawk.
Battle conditions
To progress in the Glitz Pit, Grubba (or Jolene once Chapter 3 is completed) will impose a special condition on Mario during his battles. The condition must be fulfilled for a victory to be counted and to move up the rankings. There are several possible conditions and usually it is randomly chosen, though some battles in Chapter 3 have fixed conditions:
- For Mario's first battle against The Goomba Bros., the order will always be to appeal to the crowd at least once.[1]
- For the championship match against Rawk Hawk, Mario will always be instructed to use a special move, though it is not actually required to be performed.[2]
Evidently, other fighters are given conditions that Mario will never be instructed to perform, as at one point Grubba instructs Sir Swoop to "do a triple flip and meow."
The condition Mario is given will be displayed briefly at the start of a battle in the Glitz Pit. In the Nintendo Switch version, the condition will also be displayed for the full duration of battle in the lower-left corner of the screen. Additionally, it will be highlighted in green and marked with a green checkmark when it is successfully fulfilled, or a red cross if it is failed.[3]
| Nintendo GameCube | Nintendo Switch |
|---|---|
| Appeal to the crowd at least once. | Appeal to the crowd at least once. |
| Appeal to the crowd at least three times! | Appeal to the crowd at least three times! |
| Don't attack in the first three turns! | Don't damage your opponent in the first three turns! |
| Don't ever let your partner attack! | Don't ever let your partner damage your opponent! |
| Only let your partner attack! | Only let your partner damage your opponent! |
| Don't change partners! | Don't swap partners! |
| Don't use your jump! | Don't use your jump! |
| Don't use your hammer! | Don't use your hammer! |
| Don't use your FP!/Don't use any FP! | Don't use your FP! |
| Don't use items!/Don't use any items! | Don't use items! |
| Defeat your opponent in five turns or less! | Win in five turns or fewer! |
| Take damage from your opponent three times! | Take damage at least three times! |
| Take damage from your opponent at least five times! | Take damage at least five times! |
| Use a special move at least once. | Use a special move at least once. |
| Don't use special moves! | Don't use special moves! |
| Win after your HP drops to 5! | - |
| - | Use a partner skill at least once. |
| Win before taking 20 HP of damage! | Win before taking 20 HP of damage! |
| - | Don't hold back! |
Exhibition Match
The Nintendo Switch remake introduces Exhibition Matches, which can be partaken at any point after Mario has joined the Glitz Pit. Mario can face previous opponents any time after beating them, while a selection of special opponents can also be challenged once certain prerequisites are met. Exhibition Matches do not have any battle conditions nor have any affect on Mario's rank, but will still award prize money like Ranked Matches do.
| Exhibition Match Special Opponents | |||||
| Picture | Fighter Name | Members | Prerequisite | ||

|
Sleepy Stealth Scythe Wings of Night |
4 Swoopers | Available after Mario reaches Rank 11 and witnesses Sir Swoop's induction to the Glitz Pit. | ||

|
The Flying Bullets The Destructors |
2 Spinias and 2 Spanias | |||

|
The Returning Royal Prince Mush |
Prince Mush | Available after completing Chapter 8 and receiving an email from Prince Mush inviting Mario to face him in an Exhibition Match. | ||
Battle quotes
Partners
Each of Mario's partners have dialogue that they will say on stage before the battle begins, and after winning the match.
| Character | Before Battle | When Mario Wins |
|---|---|---|
| Goombella | "We aren't gonna lose to scrubs like YOU!" "C'mon, Mario! Let's get this over with!" |
"See?!? No biggie!" "What did you expect, huh? We rock!" |
| Koops | "I'll try not to get in your way, Mario..." "Ummm... OK, we can do this!" |
"We...won? Cool!" "We did it, Mario! Wow!" |
| Flurrie | "Here we go, darling! Time to shine!" "Mario, darling... Are you quite ready?" |
"Why, that was no fuss whatsoever!" "Anytime you care for another lesson, we'll be here! ♡ " |
| Mini-Yoshi | "Lemme at 'em! Yeah! Bring it! You ready for a beating?" "You think you can take me and Gonzales? HA!" |
"Ah ha ha ha ha ha ha ha! How'd that floor taste?" "That all you got?" |
| Vivian | "You're about to have a really terrible experience!" | "Looks like we overdid it a little bit... Are they OK?" |
| Admiral Bobbery | "Leave it all to me, old boy! I shan't need help!" | "I suggest you try a bit harder against the likes of us, hm?" |
| Ms. Mowz | "You look a bit weak to be fighting us... Mmm hmm hmm!" | "Well, what did you expect?" |
Opponents
Each opponent has dialogue that they will say on stage before the battle begins, and if Mario loses or forfeits the match.
| Team | Before Battle | When Mario loses |
|---|---|---|
| The Goomba Bros. | "Remember, guys, we're Bros.! If we combine our strength, we'll ruin anybody!" | "Awww, poor little rookie! You didn't really think you could beat us, did you? Pro battling isn't easy! Go wash that mustache and come back sometime! Ha!" |
| The KP Koopas | "Meet my peeps, Gonzales! I told you we were gonna square off, and now it's ON!" | "You're gonna need about ten years of experience to beat King K and the KP Koopas!" |
| The Pokey Triplets | "Go ahead... Touch usssssss... It won't hurrrrrrrrrrrrt... too muchhhhh..." | "We warrrrrrrrrned you... It hurrrrrts to touch usssss... Hehhhh hehhhhh hehhhhhhh..." |
| The Dead Bones | "We're gonna take the skin off YOUR bones!" | "Pbbbbbbbth! You need more calcium in your diets!" |
| Spike Storm | "We're gonna spike-bomb you into submission, punks!" | "Yeah! How'd you like it? Those spikes feel gooooood? If you want more, just ask!" |
| The Hand-It-Overs | "Heh heh heh heh heh! We're awful quick, awful agile...and just plain awful!" | "Heh heh heh heh heh! That was too easy! Didn't think you could keep up!" |
| The Mind-Bogglers | "Prepare to be ensnared, mystified, and devoured!" | "Like helpless bugs in a web... Our latest victims!" |
| The Punk Rocks | "This no take long. This end in pain for mustache." | "Pathetic mustache." |
| The Bob-omb Squad | "Here we go, Gonzalez BOMB! I have advice! Just give up now BOMB-BOMB!" | "We won BOMB-BOMB-BOMB! Gonzalez is not too tough BOMB-BOMB!" |
| The Iron Adonis Twins | "We're gonna blend you up into a smoothie, pal! And then we're gonna drink ya!" (initial match) | "Bluh huh huh huh huh... How'd you like that? We tried to tell you, but nooooooo..." (Red Iron Cleft, initial match) "If you want another piece of pummel pie, have a bath and come on back! Punk!" (Green Iron Cleft, initial match) |
| "These ultrahard bods just can't lose!" rematch) | "Better work out and bring it again next time!" (rematch) | |
| The Tiny Spinies | "Wheeee! It's gonna be fun poking fun at you!" | "We may be tiny, but we just kicked your heinie!" |
| The Poker Faces | "Hoo hoo hoo hoo hoo hoo! You're gonna be coleslaw, kid! And that ain't good!" | "Lemme ask you something: how does it feel to be coleslaw? Icky?" |
| The Shellshockers | "So-called Great Gonzales! Don't think I'm gonna take it easy on you, baby!" | "Still got it, baby!" |
| The Fuzz | "Meeeeork! Meeeeeeork! We'll suck up your SOULS! MEEEEEORK!" | "Meeeeork! Meeeeeeork! Mmmmmm! You were tasty! MEEEEEORK!" |
| The Magikoopa Masters | "You, fool, would do well to fear our dark magic..." | "You are but a poor mortal, blind to the magic world..." |
| Craw-Daddy | "Foolish mortals... I will drag you through the gate to the netherworld!" | "Your screams echo in the endless void..." |
| Hammer, Bamma, and Flare | "My grandpappy's hammer is gonna strike you down, man! Here it comes!" | "What did you like the best? The burning? The beating? Or maybe the boomeranging?" |
| Chomp Country | "ARF! ARF! ARF! ARF! ARF!" | "YIPE! YIPE! YIPE! YIPE!" |
| The Koopinator | "You. Finally, I get a piece of you. Finally, we'll see who's truly stronger." | "Hmmph... We'll meet in combat again, I'm sure. I suggest you practice." |
| Wings of Night | "Teach me, O Master!" | "I beat my master! I look forward to the next lesson!" |
| The Destructors | "You got bad luck, getting matched up against us." | "Hey, sorry, tough luck... No, it wasn't luck! We're just too tough!" |
Enemies
- For a detailed listing of enemy formations in the Glitz Pit, see List of enemy formations in Paper Mario: The Thousand-Year Door § Glitzville.
Bolded enemies can only be fought in the Glitz Pit.
- Bandit
- Big Bandit
- Bob-omb
- Boomerang Bro
- Bowser (Boss, fought after defeating the fighters in rank 5)
- Bristle
- Dark Craw
- Dark Puff
- Dark Koopatrol
- Dull Bones
- Fire Bro
- Flower Fuzzy
- Fuzzy
- Goomba
- Green Fuzzy
- Green Magikoopa
- Hammer Bro
- Hyper Bald Cleft
- Iron Adonis Twins (Mid-Boss)
- KP Koopa
- KP Paratroopa
- Lakitu
- Macho Grubba (Chapter 3 Boss)
- Pale Piranha
- Pider
- Prince Mush (Boss, Nintendo Switch version only)
- Pokey
- Rawk Hawk (Boss, Championship Match)
- Red Chomp
- Red Magikoopa
- Red Spike Top
- Shady Koopa
- Shady Paratroopa
- Spania
- Spinia
- Spiny
- Swooper
- White Magikoopa
Characters
Promoters
Notable individual fighters
- Bandy Andy
- Cleftor
- Craw-Daddy
- Hamma Jamma
- Iron Adonis Twins
- King K
- The Koopinator
- Master Crash
- Prince Mush
- Rawk Hawk
- Shellshock
- Sir Swoop
- Spiky Joe
Misc.
- A red Toad who works part-time in the lobby
- An orange Toad girl in love with the red Toad worker
- A Lakitu cameraman. Goombella's tattle states, "That's a local cameraman. He seems a little flustered. I think he's new at this and makes lots of mistakes. Just a guess, though."
- A reporter who looks like a pineapple. Goombella's tattle states, "That's a local reporter. I'm pretty sure he covers the fight scene. He's such a veteran, he even directs the rookie cameraman next to him."
- A Toad father and son who are fans of Prince Mush
- Toodles
- A Lakitu freelancer who can be found on the second floor in the lobby. Goombella's tattle states, "That's a freelancer. He's always angling for the next big scoop. We'd better make sure this guy doesn't shoot us doing anything... incriminating."
- Glitz Pit Security
- Mini-Yoshi
- Ms. Mowz (during Chapter 3)
Items
| Item | Icon | Location |
|---|---|---|
| Battle Trunks ×20 | All in the storeroom during Jolene's trouble. | |
| Champ's Belt | Won after defeating Rawk Hawk. | |
| Charge P | In the first-floor storeroom, it can be found among the boxes in the northeast corner with Flurrie's help. | |
| Dubious Paper | In the minor league locker room, it can be found on top of the shelf in the room to the left. | |
| Gold Star | Given to Mario after he helps Jolene defeat Macho Grubba at the end of Chapter 3. | |
| HP Plus P | In the second-floor storeroom, it can be found on top of the big box in the left. | |
| Ice Storm | In the major-league room, it can be found in the northwest corner. | |
| Last Stand | In the corridor of the Glitz Pit, it can be found in a blue box near the right entrance. | |
| Shine Sprite | In the second-floor storeroom, it can be found by the north wall between the boxes. | |
| Star Piece | In the lobby, one is under a panel in the wall corner to the northwest of the entrance. | |
| In the office, one is in the drawer near the computer. | ||
| In the office, one is behind the plant in the southwest. | ||
| In the first-floor storage room, one is under a panel on the floor. | ||
| To the right of the second-floor storage room, one is among the rightmost boxes. | ||
| Storage Key | In the second-floor lobby, it can be found behind the leftmost poster during one of X's missions. | |
| Wrestling Mag | In the office, it is held by Jolene and given to Mario during Toodles's trouble. |
Area Tattles
- "This is the Glitz Pit lobby. It's pretty nice, actually! Sturdily built, nice decor. And what can you say about that luxurious chandelier except... FABULOUS!!!"
- "This is the Glitz Pit itself! That's the ring in the middle. That's where all the magic happens. And by "magic," I mean brutal beatdowns."
- "This is a backstage corridor. Compared to the Glitz Pit, this is so... businesslike. There's security all OVER, so you can't just wander around wherever you want."
- "This is a minor-league locker room. It's kind of, uh... Well, it's pretty disgusting. It's totally different from the first room they showed. The old bait-and-switch... You think they make it totally gross so fighters will try harder to advance?"
- "This is a major-league locker room. Everybody here dreams of reaching the top... You can almost feel the intensity of their ambition in the air... It's weird... Speaking of weirdness, there's ALWAYS someone in the bathroom. Creepy! Y'know, it's kinda necessary to have access to a bathroom now and then..."
- "This is a minor-league locker room. It's just as gnarly as the one we were in. If you check the lockers or behind the posters, I bet there are stains and graffiti."
- "This is another locker room for major-league competitors. It's opposite the other one. Why was there a hidden room behind the lockers, anyway? What would it be used for? Mysteries are totally everywhere in the Glitz Pit!"
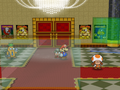
- "This is the champ's room. Yeah... This has to be like, the WORST decorating ever! Like that tiger-print bed... I mean, COME ON! Think Rawk Hawk designed it? Or maybe Grubba? It couldn't be...Jolene?"
- "This is the Glitz Pit storeroom. They must keep props or something in here. There's a second floor, too. If you see anything odd, don't forget your partners..."
- "This is the storeroom. There are lots of wooden crates here, that's for sure. But it doesn't seem to be in use now, does it? I mean, it's COVERED in dust!"
- "This is the promoter's room. It's fitting... It has sort of a relaxed authority, y'know? This is where the pairings for each match get decided. Neat!"
- "We're in the ventilation duct. It's really cramped in here. And musty. And dank."
Gallery
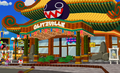
Outside of the arena
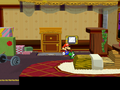
The lobby
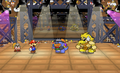
The ring
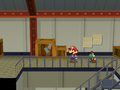
The hallway
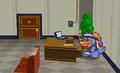
Grubba's office
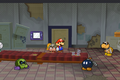
The Storage Room
The Minor-League locker room
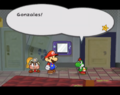
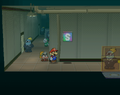
Mario meeting the newly hatched Mini-Yoshi
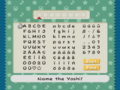
The Mini-Yoshi naming screen
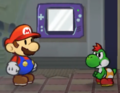
Mini-Yoshi joining the party
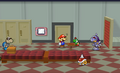
Mario and Mini-Yoshi
The Major-League locker room
The Champion's room
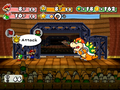
Mario and Mini-Yoshi vs. Bowser

Mario and Mini-Yoshi vs. Rawk Hawk
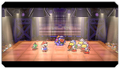
The ring in the Nintendo Switch remake
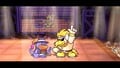
Grubba and Rawk Hawk in the Nintendo Switch remake
Grubba announcing Mario and Koops as the winners in the Nintendo Switch remake


Names in other languages
| Language | Name | Meaning |
|---|---|---|
| Japanese | とうぎ場 Tōgi-jō |
Arena |
| Dutch | Knokwijck-Arena |
Glitzville Arena |
| French | Arènes de Yunnanville |
Glitzville Arenas |
| German | Falkenheim-Arena |
Glitzville Arena |
| Italian | Stadio di Oolong |
Glitzville Stadium |
| Spanish | Arena Dojo El Coliseo |
Dojo Arena The Coliseum |
Trivia
- If the player chooses to return to the Glitz Pit after completing Chapter 3 and makes it to 1st place, during the Championship Match, the crowd chants "GONZALES! GONZALES!". One spectator will say "JUMPMAN!!! Wait, who?". This is a reference to Mario's alternate name for the classic arcade game Donkey Kong. Should the player also win the championship, there will be a crowd that goes after the champion once in the foyer.
- The Mario posters that are seen in the foyer do not reappear should Flurrie blow them out.
- There is a Bob-omb and a Bulky Bob-omb depicted on a poster in the foyer, even though no Bulky Bob-ombs are fought in the Glitz Pit.
- Glitz Blade, one of the Sammer Guys in Super Paper Mario, references the arena.
References
- ^ Malleoz et al (March 2, 2014). Submission #4148: Malleoz, CoolKirby & Masterjun's GC Paper Mario: The Thousand-Year Door in 4:52:30.72. TASVideos. Retrieved on August 9, 2016.
- ^ Mark Wong (February 18, 2009). Speed Demos Archive - Paper Mario: The Thousand-Year Door. Speed Demos Archive. Retrieved August 12, 2016.
- ^ Paper Mario: TTYD Gameplay Compilation IN ORDER - Direct Feed No Commentary Retrieved April 28, 2024.